
Machine Tool Guards and Shields
Manual and CNC Lathe Guarding
Hinged polycarbonate chuck guards for manual and CNC lathes - Available in standard and interlock
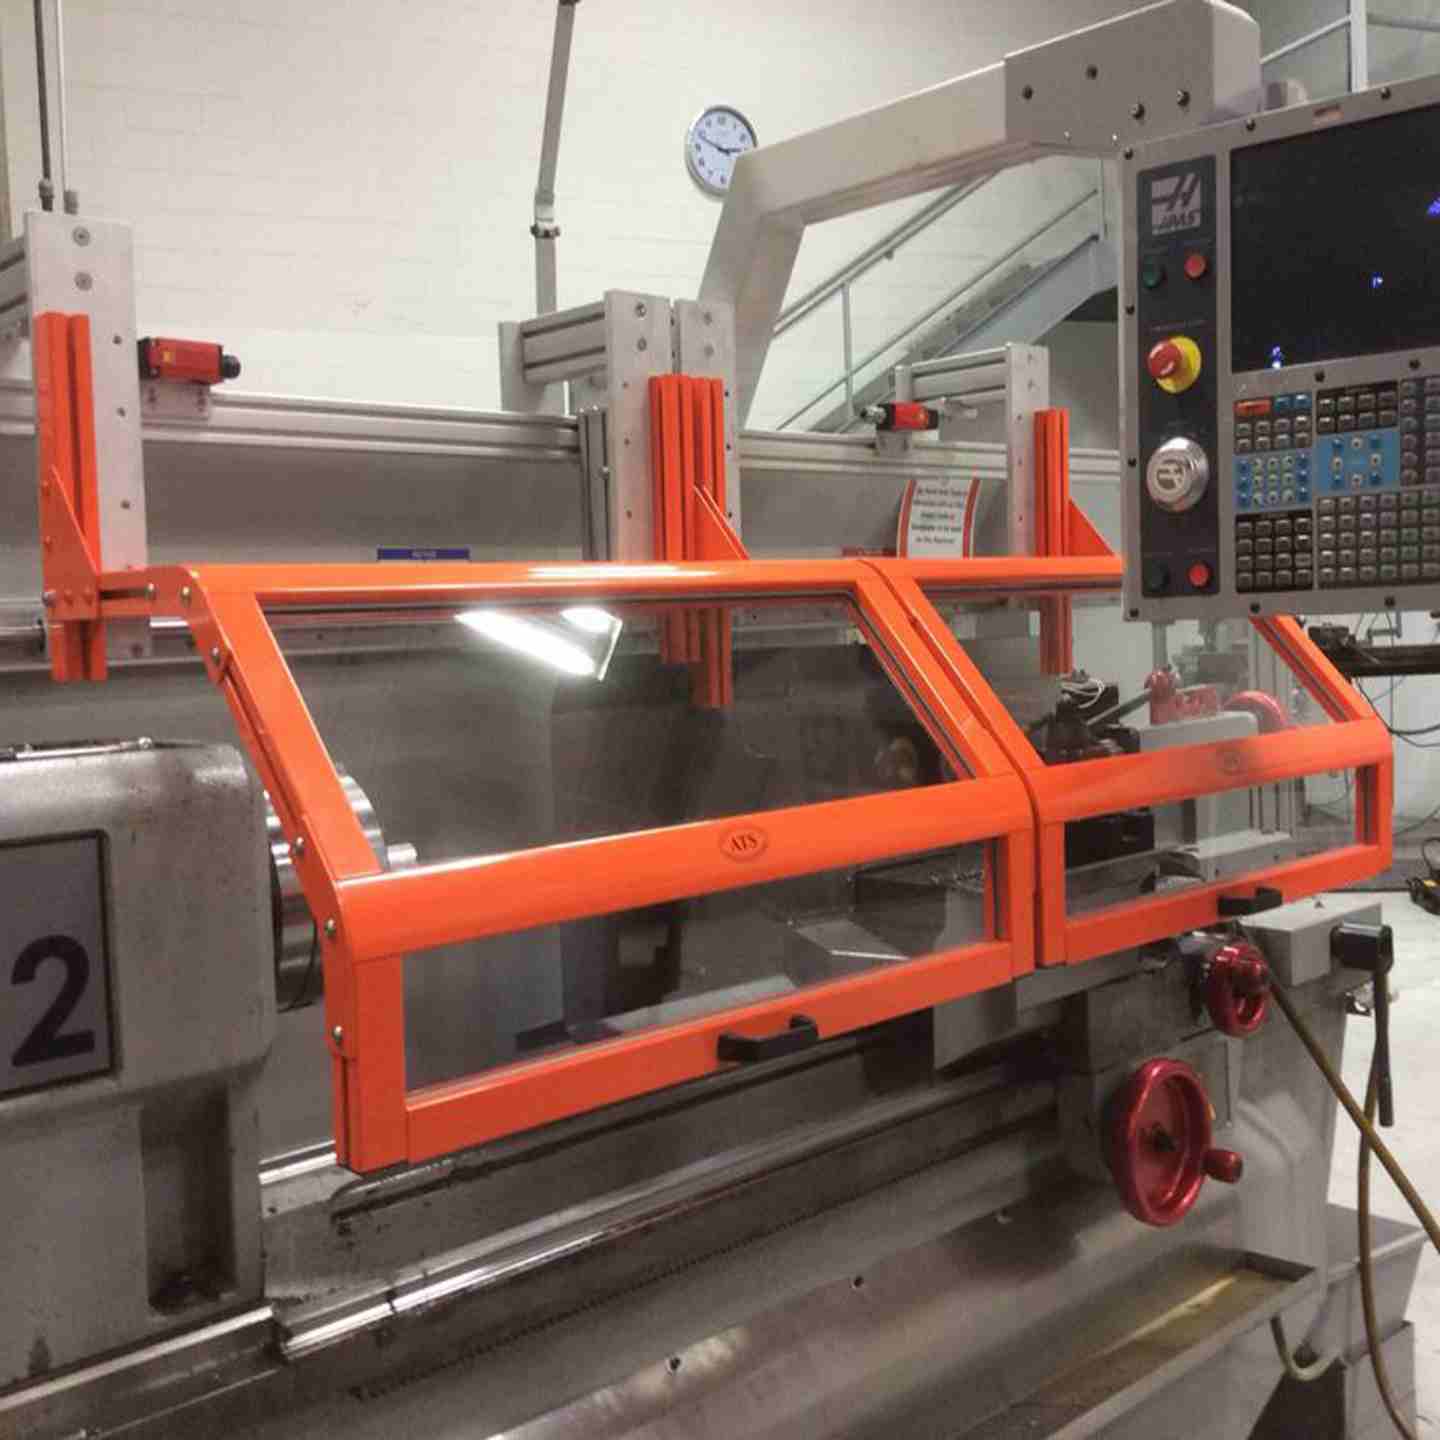
The LG-TR3 Hinged Lathe Guard creates a barrier between operators and the rotating chuck, flying chips, and coolant spray during turning operations on manual and CNC lathes. It mounts to the lathe's existing gearbox lid bolts using slotted brackets, so drilling into the machine typically isn't required, and a gas strut holds the guard fully open for setup and part changes. The guard is available in 12 inch or 18 inch wide versions (LG-TR3-12 and LG-TR3-18), standard or with a magnetic (SK1) or RFID style (SK2) safety interlock switch pre installed.
Key Features
- Gas strut assisted hinge lifts and holds the guard fully open during setup and part change, no hands free balancing required
- Mounts to the lathe's existing gearbox lid bolts using slotted brackets; drilling into the machine is optional, not required in most installations
- Available in 12 inch (LG-TR3-12) or 18 inch (LG-TR3-18, most popular) wide versions
- Slotted brackets offer 4 inches of front to rear adjustment and can be flipped on the mounting extrusion for left hand or right hand spindle orientation
- 1/4 inch thick, replaceable polycarbonate (Lexan) shield and side panel; the side panel is trimmed to fit at installation and blocks reach in contact with the rotating chuck
- Front PVC strip curtain adds chip containment while maintaining access to the compound handle
- Powder coated OSHA Safety Orange aluminum extrusion frame (40x80mm)
- Available standard (no switch), with a 120VAC/24VDC magnetic safety interlock switch (SK1), or a 24VDC RFID style safety interlock switch (SK2); the interlock retrofit can be added to a standard unit later
- Safety switch output rated to 2A; interlocked models require a motor control device to interface with 3 phase machine spindle control (sold separately)
- Optional side of gearbox mount style available as an alternative to the standard mount position
- Optional LED work light bar available as an accessory
Manual and CNC Lathe Guarding
Hinged polycarbonate chuck guards for manual and CNC lathes - Available in standard and interlock
The LG-TR3 Hinged Lathe Guard creates a barrier between operators and the rotating chuck, flying chips, and coolant spray during turning operations on manual and CNC lathes. It mounts to the lathe's existing gearbox lid bolts using slotted brackets, so drilling into the machine typically isn't required, and a gas strut holds the guard fully open for setup and part changes. The guard is available in 12 inch or 18 inch wide versions (LG-TR3-12 and LG-TR3-18), standard or with a magnetic (SK1) or RFID style (SK2) safety interlock switch pre installed.
Key Features
- Gas strut assisted hinge lifts and holds the guard fully open during setup and part change, no hands free balancing required
- Mounts to the lathe's existing gearbox lid bolts using slotted brackets; drilling into the machine is optional, not required in most installations
- Available in 12 inch (LG-TR3-12) or 18 inch (LG-TR3-18, most popular) wide versions
- Slotted brackets offer 4 inches of front to rear adjustment and can be flipped on the mounting extrusion for left hand or right hand spindle orientation
- 1/4 inch thick, replaceable polycarbonate (Lexan) shield and side panel; the side panel is trimmed to fit at installation and blocks reach in contact with the rotating chuck
- Front PVC strip curtain adds chip containment while maintaining access to the compound handle
- Powder coated OSHA Safety Orange aluminum extrusion frame (40x80mm)
- Available standard (no switch), with a 120VAC/24VDC magnetic safety interlock switch (SK1), or a 24VDC RFID style safety interlock switch (SK2); the interlock retrofit can be added to a standard unit later
- Safety switch output rated to 2A; interlocked models require a motor control device to interface with 3 phase machine spindle control (sold separately)
- Optional side of gearbox mount style available as an alternative to the standard mount position
- Optional LED work light bar available as an accessory
Assembly / What's Included
- Powder coated aluminum extrusion frame (40x80mm)
- Gas strut assisted hinge
- 1/4 inch polycarbonate (Lexan) shield and side panel
- Front PVC strip curtain
- Slotted mounting brackets
- Installation instructions
Configuration Options
- LG-TR3-12: 12 inch wide guard
- LG-TR3-18: 18 inch wide guard (most popular)
- Add SK1 for a 120VAC/24VDC magnetically actuated safety interlock switch
- Add SK2 for a 24VDC RFID style safety interlock switch (requires a stable 24VDC supply)
- Optional side of gearbox mount style, in place of the standard mount position
- Optional LED work light bar accessory
Materials & Construction
- Powder coated OSHA Safety Orange aluminum extrusion frame (40x80mm)
- 1/4 inch thick, replaceable polycarbonate (Lexan) shield and side panel
- Gas strut assisted hinge (a replaceable wear part)
- Front PVC strip curtain
Guard Doesn't Hold Fully Open / Gas Strut Fails
Guard drops or won't stay open during setup or part change
- Inspect the gas strut for leaks, damage, or loss of gas pressure
- Confirm the wire retention clip is properly seated on the strut
- Replace a failed gas strut with a replacement part; this is a normal wear item, not a structural failure
- Check that the strut is properly connected at the front mounting point
Guard Doesn't Mount Flush / Bracket Alignment Issues
Brackets don't line up with gearbox bolts; guard sits crooked
- Remeasure the distance from the edge of the gearbox to the first bolt, and the distance between gearbox bolts, before positioning brackets on the extrusion rail
- Confirm the frame protrudes the correct distance from the gearbox surface: 13.5 inches for the LG-TR3-12, 19.5 inches for the LG-TR3-18
- Verify replacement bolts are 1/2 to 3/4 inch longer than the original gearbox lid bolts, adding washers if needed for the bolt size
- Slide the guard so its left side aligns with the gearbox side surface, without sitting so close that the guard can't hinge down with the side lexan installed
Side Lexan Panel Doesn't Line Up / Reach In Protection Is Incomplete
Side panel gaps, doesn't seat, or doesn't block chuck access
- Use an allen wrench to reposition the T-nuts on the left side of the guard until they align with the side lexan's holes before bolting it on
- Confirm the side panel has been trimmed correctly to fit your specific machine, as required at installation
- Recheck that all T-nuts are aligned before final tightening; misaligned nuts can leave gaps
Shield or Panel Needs Replacement
Lexan shows cracks, chips, stress marks, or heavy scratching
- To remove the shield: disconnect the gas strut at the front only and let it hang, remove the 3 M8 bolts with a 5mm allen wrench, remove the right side guard frame, then slide the lexan out of the channel
- Reverse these steps to reinstall; confirm the rubber gasket or glazing is properly seated in the grooves before reattaching the frame (a rubber mallet can help seat it)
- Clean lexan with mild soap or Windex and plenty of solution on a clean, damp rag; avoid dry wiping or abrasive cleaners, which can scratch the surface
Safety Interlock Switch Does Not Signal Correctly (Interlocked Models)
Machine doesn't stop when guard opens; motor control doesn't respond to switch state
- Confirm the safety switch output (rated 2A max) is wired to a compatible motor control or safety relay; the switch alone cannot directly interrupt a 3 phase machine motor
- Verify wiring connections are secure at the switch, motor control, and any terminal strips
- For SK1 (magnetic) models: confirm the actuator magnet on the guard is correctly aligned with the switch body when closed
- For SK2 (RFID) models: confirm a stable 24VDC supply is present; the RFID switch requires DC power and will not operate on AC
- Test the switch in isolation by manually cycling it and verifying the output state changes at the motor control or relay input
- If the switch is suspected damaged, contact PowerSafe for a replacement; the interlock retrofit kit can replace a switch on an existing guard
Machine Compatibility Concerns
Guard doesn't seem to fit the chuck or spindle correctly
- Confirm the correct width (12 inch or 18 inch) was ordered for your machine's gearbox and chuck size
- For left hand or right hand spindle orientation, confirm the brackets were flipped on the mounting extrusion correctly during installation
Preventive Maintenance
To keep the LG-TR3 performing reliably:
- Inspect the gas strut periodically for leaks or reduced holding force; replace it if the guard no longer stays open on its own
- Clean the polycarbonate shield and side panel regularly with mild soap or Windex and a damp rag
- Check mounting bolts and bracket hardware for looseness at regular intervals
- For interlocked models, cycle the guard open and closed at each maintenance interval and verify the motor control responds correctly to the switch state
- Inspect the PVC strip curtain for tears or excessive wear and replace as needed
Fault Tracking & Continuous Improvement
- Log any gas strut replacement, shield replacement, or interlock fault, including the machine and date
- Look for recurring patterns, such as repeated gas strut failure tied to a specific machine's usage rate
- Use this history to plan hardware replacement before failures affect protection